Yesterday morning I started with a 2 foot pile of fabric cutting my 21/2 inch strips. 

If I had thought this through more… I would have pressed and prepped the fabrics as I pulled them off the shelves.Most had some pretty strong fold marks from storage. ( If I had recently purchased it all it would have been nice and smooth saving me a lot of time. But this was stash…which saved me a lot of $$$ !. On the other hand, If I had started pressing it all first, I would have really seen how much there actually was to cut. YIKES!
Yardage for a queen size is listed as 6-8 yards. That is a LOT of 21/2 inch strips let me tell you!
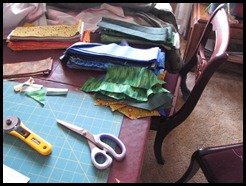

I started pressing and cutting,. For about 2 hours press and cut was my mantra. When I had a bit from each color cut to strips, I cut the strips to 8 inches pieces with a 45 degree angle on one end. Thankfully about that time Erika popped in and we chatted as she started separating the left and right strips after I trimmed the points. The company made it go much faster or at least seem to.


When all the strips were cut to length and trimmed, I had a plastic shoebox nearly full of at least 2 inch scrap pieces and a bunch of triangles. To give you an idea of how many strips there are those are 3 inch stacks of triangles! I mangled and tossed about half that amount. I’m sure I’ll find a use for these…sometime.
Luckly Mr. Fix-It had a meeting and wouldn’t be home for supper, which gave me a bit of extra time & was able to get everything cut and ready for sewing. After a quick break for my own supper I dove in.
Sew a strip & press it down, sew a strip and press it down.
I’m not using a set “pattern” of fabric placement other than alternating light and dark shades
Progress in the morning light

Each strip is about 3 ft long at this point
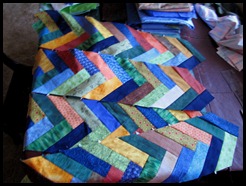
Before I start back in this morning, I need to straighten my sewing area. Strips were flying for bit last night

I think I need a latte first before I tackle that mess!
Katie


